I Love Fall. The colors, the sound of leaves crunching under your feet, the crisp chill in the air and the blue sky. Here is a project I made for my home. Flower pot, straw hat, burlap, felt, buttons and some fall flowers. I made this also for my two sisters birthday and added real flowers. They loved it.
Be Courious and give it a try.
Followers
Sunday, October 19, 2014
Fall
Friday, October 17, 2014
CHRISTMAS ELF
Tic Tac Holder
That's how its been in my house lately "A CIRCUS" full of monkeys!
Sorry ladies I've been trying to get this post done all week...but...
I got this idea from a You Tube video by Dawn. I think her channel is Stampingwithdawn.
I had to change it up because I don't have all the punches. I Love my Cricut! I am still using the Expression and my Gypsy. (just holding my breath that it keeps working) So sad that they are not supporting the gypsy anymore. Well here goes. I hope this helps you make some cute Elves!
Supplies Needed
Cricut machine
Cartridges: Art Philosophy & Artiste
Card stock
B & T paper (I used scraps)
Window sheet ( I used packaging material )
Sticky notes
1 1/2" circle punch
Small paper punch (different sizes )
Tic Tacs (I used the lg,)
Adhesive
Cut the following shapes
Face: Shape # 6 at 1 1/2" Art Philosophy pg. 27
Ears: Accent #4 at 1/2" Artise pg. 54
Hat band: Shape #4 at 1 1/2" Art Philosophy pg. 56 Hat: Banner #4 or 5 at size of your choice Art Philosophy pg. 49 & 59
Shoes: Same as ears
Eyes & Ears small paper punches
Supplies
Cuts
Putting your ELF together
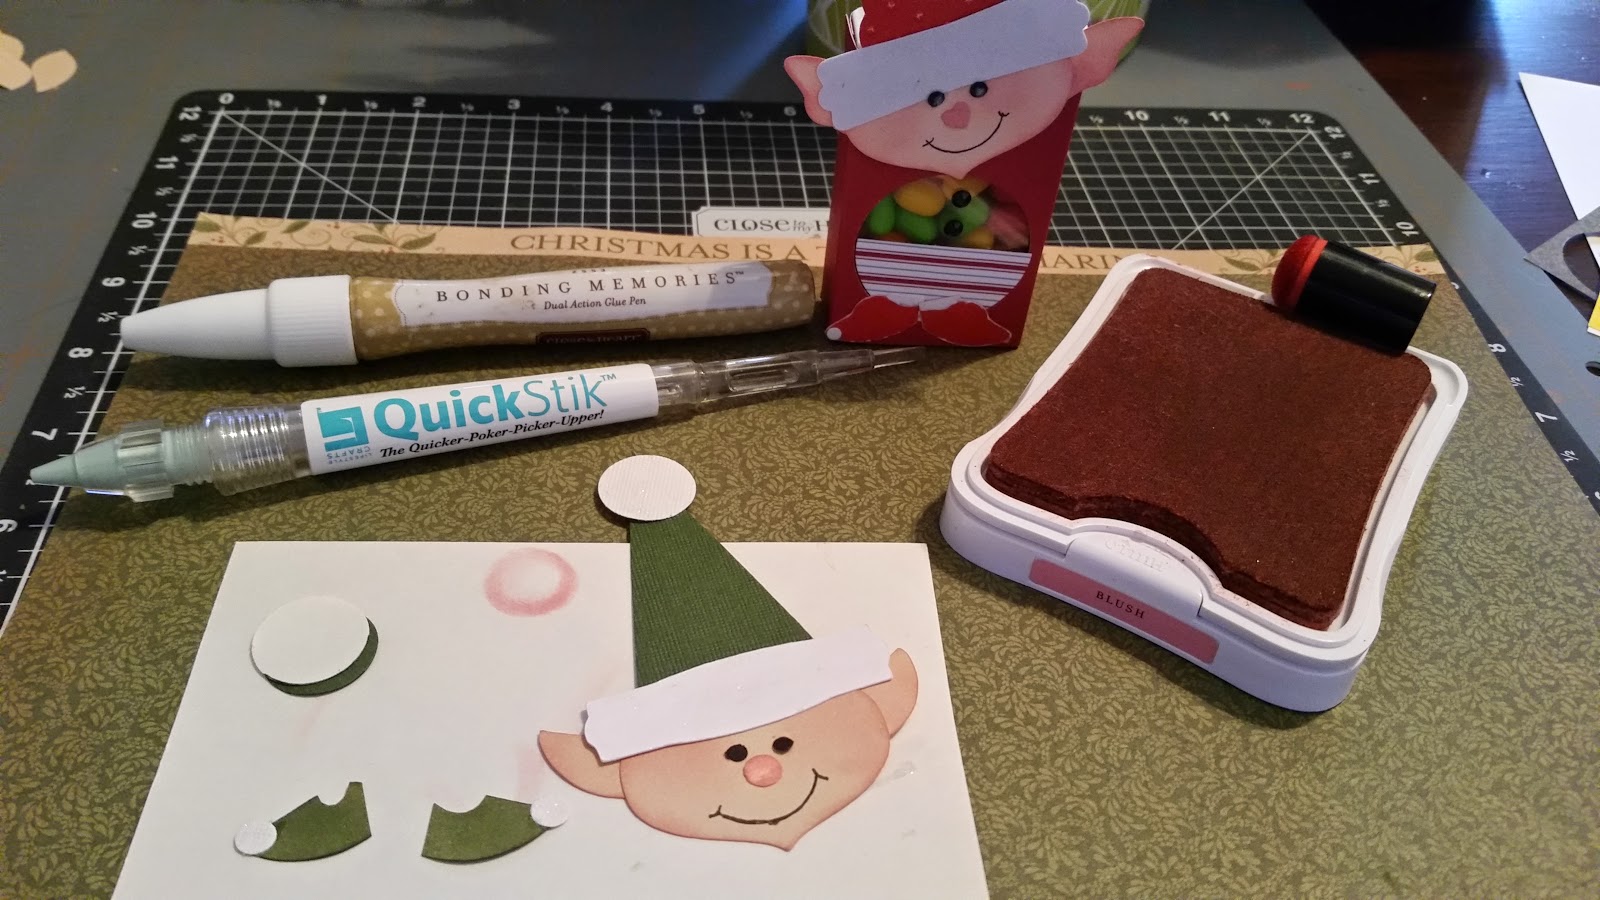
I inked the edges of face, ears, and nose with blush ink and added some rosy cheeks also.
I used champagne CTMH card stock for the face & ears. You can use a pale pink if you want but I ran out. Hat & shoes are cut from old Olive. The eyes & nose I punched using a regular hole punch of different sizes I put together my elf then worked on the Tic Tac holder.
I used CTMH glue pen and my "QuickStick"( I just love this could not live without it) I helps you pick up & place the small pieces. ( I got mine at Creating Keepsakes convention last year)
To make the smile I used a 3/4" circle punched out to trace around & keep it just right.
For the shoes : Turn the ear shape upside down, cut off a small piece for the backside of the shoe, then cut a little semi-circle in the top to make it look like a shoe. I added a 3/4" circle at top and use a "wink of Stella" pen to add some sparkle to it and the hat band. I used a white gel pen to add highlights to the eyes & nose. There now you have a cute little ELF. You can change up the colors and hat shapes, add glitter or use glitter paper for some of your pieces.
Now to make the Tic Tac holder. You need a piece of paper cut 2 3/4" by 5 1/4".
Score at 5/8", 2 3/8", 3" and 4 3/4". Once you do this you will see that you have a small area at your last score mark. this is where you put your score tape. Next with your score tape on the left side, you will need to punch a hole with your 1 1/2" punch. First I punched the circle from a post it note with sticky part in the circle. I put the sticky note on a piece of card stock (makes it easier to punch). Then I place the sticky note circle on my paper so I can get it in the center. Remember to leave enough space at the bottom to add your shoes. Once your hole is punched turn you paper over & add you window piece. I cut mine a little less than 2" x 2" and used my tape runner at top & bottom to adhere it. Now punch out a circle of decorative paper ( I used last years CTMH Pear & Partridge) Cut the circle in half & adhere to front bottom of the window. Add two small black pearls above the paper (onto the window sheet). Then add your ELF and the shoes.
CHRISTMAS ELF
I hope this has explained well enough. Sometimes I feel like I am just rambling! Hope you guys enjoy make these sweet Elves. You can use them for many things. Please be kind and like this post . I would love for you guys to post the Elves you come up with.
Be Curious!
What else can you think of to use these cute elves? Follow my blog and you will see some other things I have used my Elves for. Happpy Crafting!
Subscribe to:
Posts (Atom)


